Application report
-
No article! Next >

|
The three-dimensional residual magnetic method characteristics of stress testing system
- The precise distribution of nondestructive measurement of residual stress along depth
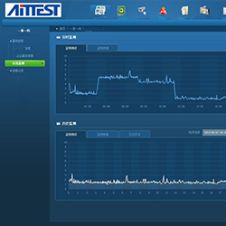
- Windows operating system, the interface is concise and lively
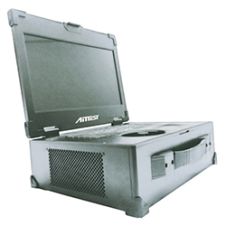
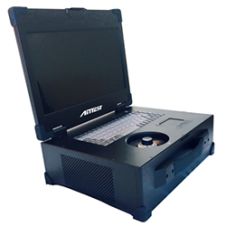
- The tester uses USB communication interface, convenient data transmission
- Automatically adjust the excitation current size and frequency of the stimulation signal changes with depth measurement
- Measurement, sampling, calculation and drawing are all controlled by the computer
- The measurement results of test data, can be stored in text form, the measurement results can be saved or printed on curve
- Can choose the path for the test, a test point cannot or do not need to avoid
- For surface measurement, a correction procedure
The residual magnetic method should be the basic principle of force test
- In machinery manufacturing, petrochemical, aerospace, railway construction, highway, water conservancy and electric power in the field of material, stress state and microstructure are the main factors influencing the service life. Nondestructive detection of structure residual stress and some mechanical properties has important economic significance and practical value. The magnetic method is based on the ferromagnetic material stress, magnetic properties to evaluate internal stress. The practical method of magnetic noise and magnetic strain.
- Magnetic noise method in magnetic field and stress, resulting in orientation domains occur regularly, produce an electrical pulse signal, the signal frequency from several kHz to several hundred kHz, called Barkhausen noise (B.N). The B.N signal is usually the size of the peak or average value to express. The internal stress of materials and some mechanical properties and the B.N signal has a certain corresponding relation. Magnetic noise method is based on the magnitude of the B.N signal to determine the stress and some micro defects can be measured about 0.01mm shallow residual stress.
-
Magnetic strain, stress is measured by using the magnetostrictive effect of ferromagnetic materials, extreme magnetostriction had a good relationship with stress. At the same time, the magneto elastic interaction, magnetic anisotropy, permeability tensor and stress tensor as there is a link. The distribution of stress measuring instrument, its basic principle is through the sensor (probe) and the circuit will change the permeability change as the change of electrical flow, should be established the function relationship between the force and current value, by measuring the amount of current to determine the stress. Under certain conditions, can also determine some properties of materials, such as heat treatment, carbon content and hardness. For the plane stress state, the research results show that there exists a single value approximation of the linear relationship between expression of current principal stress difference and the difference of two directions:

(1) Type in the σ1-Maximum principal stress,Mpa; σ2-Minimum principal stress,Mpa; I1-Current output value in the direction of maximum principal stress,mA; I2-Minimum principal stress direction current output value,mA; α-Sensitive coefficient,mA/Mpa(The reference value of general structure steel is given by the calibration test.) When the principal stress direction is unknown, the principal stress Angle and principal stress difference can be determined by the formula: 
(2) 
(3) Type in the θ--The Angle between the direction of maximum principal stress and the X axis. I1, I45, I90_0o, 45o, 90o Measurement of current in three directions(mA)。 Given the principal stress difference and principal direction Angle of each point, the stress component of any point P can be obtained by the method of shear stress difference: 
(4) 
(5) 
(6) Type in theбX0Is the known stress value of the boundary pointбX0=0。 According to skin effect, skin depth can be determined by the following formula: 
(7) Type in the SSkin depth,cm; ρ The resistivity,Ω•cm; ƒ The excitation frequency,Hz; μRelative permeability。 Change ƒ The weighted average of residual stress at different depth can be determined: 
Change ƒ The weighted average of residual stress at different depth can be determined: 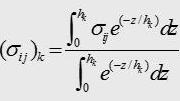
(8) Type in the(σij)k0tohkThe weighted average of residual stresses in the range. According to the weighted average of different depth, the stress gradient can be calculated by computer and the distribution curve along the depth can be printed out. After measuring the residual stress distribution along the layer depth, the other three stress components can be calculated by using difference method according to the static equilibrium differential equation of three-dimensional stressσz,τzx,τzy。When it is necessary to measure the residual stress before and after the actual effect, it is not clear to use one direction stress, and it is more reasonable to use stress intensity. The stress intensity in the three-dimensional state is 
(9) Two-dimensional stress state:σ3=0。
Basic principle of magnetic residual stress test
- Magnetic determination of residual stress is a physical method for measuring stress. Much attention has been paid to such methods around the world. In 1974, f. t. oexoba of the former Soviet union measured the distribution of residual stress in welding discs by magnetic method. Meanwhile, the residual stress of heat treatment pipes was measured by the yanliu shunsecond-class magnetic method in Japan. At the same time, the United States used to measure the internal stress of gun barrel, and R Langman also measured the residual stress of welding specimens in 1983. Until 1983, the method of determining residual stress by magnetic method was more widely used in the laboratory. In May 1983, the residual stress distribution of 1,000m3 welded spherical tank was measured by the magnetic method stress meter manufactured by handan nondestructive instrument factory for the first time. In the late 1990s, professor wang zhenshan of xi 'an jiaotong university and handan nondestructive detection instrument factory jointly developed the three-dimensional stress distribution tester. The 3-d stress distribution of spiral pipe welding, residual stress measurement of railway bridge and residual stress measurement of large building steel structure were measured by the instrument. After the establishment of our company and colleges and universities research institute cooperation on magnetic testing technology vigorously development, achieved brilliant results.

Application of magnetic residual stress test
- Lanzhou petroleum machinery research institute
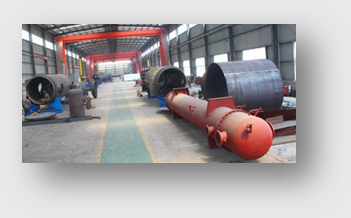
| Welding small vessel residual stress test |

|

|
|
|---|---|
|
|
- Liaoning qinghe power plant
| Measurement of residual stress after steam drum welding in qinghe power plant3Kgf/mm2maximum strength after welding22.25Kgf/mm2 (close to the22gyield limit of steelσs=27Kgf/mm2).After local heat treatment the stress drops to10Kgf/mm²or so,the result of local heat treatment is quite satisfactory. |

|

|
|
|---|---|
| Determination of residual stress before and after heat treatment of boiler drum | |
- Jilin changshan thermal power plant
Residual stress distribution after boiler drum welding
- Shandong huangtai power plant
Residual stress detection after steam turbine blade welding

- Beijing natural gas co

|
|
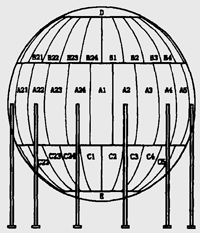
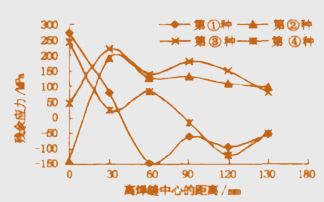
| Welding residual stress of spherical tank | |
|---|---|
|
|
- Xi 'an natatorium
| Testing of residual stress in large steel structures |
|---|

|
- Faw technology center

|

|
| Determination of residual stress distribution along layer depth of leaf spring | |
|---|---|
- Tianjin university

|
|
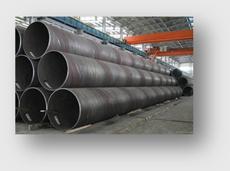
| Determination of residual stress distribution of spiral welded pipe of west-east gas transmission | |
|---|---|
- China university of petroleum

|

|
| Determination of residual stress distribution in pressure vessel and pipeline | |
|---|---|
- Ziyang machinery plant

|
|
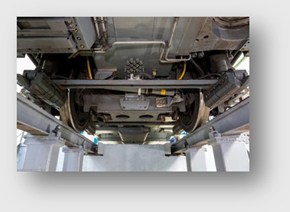
| Comparison of residual stress before and after aging of welding vibration of railway chassis structure | |
|---|---|
- City university of Hong Kong
|

|
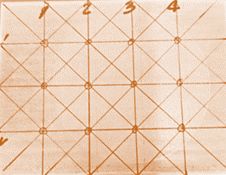
| The depth distribution of hard layer in special machining process is studied | |
|---|---|
| COMPANY: | AIT Intelligent Testing Technology (SuZhou)Co., Ltd |
|

|

 EN / English
 CN / 中文

